
en:vistascan
Interface Configuration Digital Xray: VistaScan
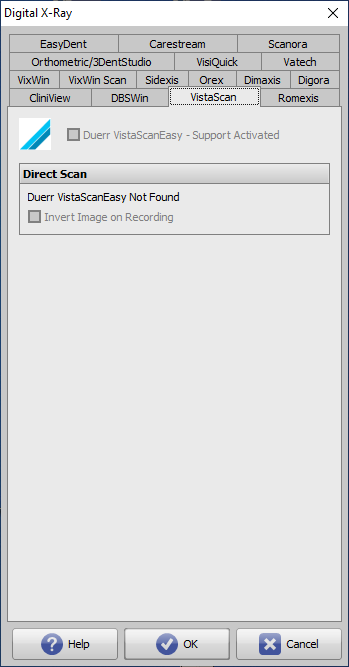
| Parameter | Setting |
|---|---|
| [Support Activated] | Activates import icon button in module Add Image 2D |
| [Bilder invertieren ] | Bildinvertierung beim Import aktivieren |
Image transfer via CLI
In VistaSoft, the transfer of the image or Dicom files to OnyxCeph³ can be configured via CLI:
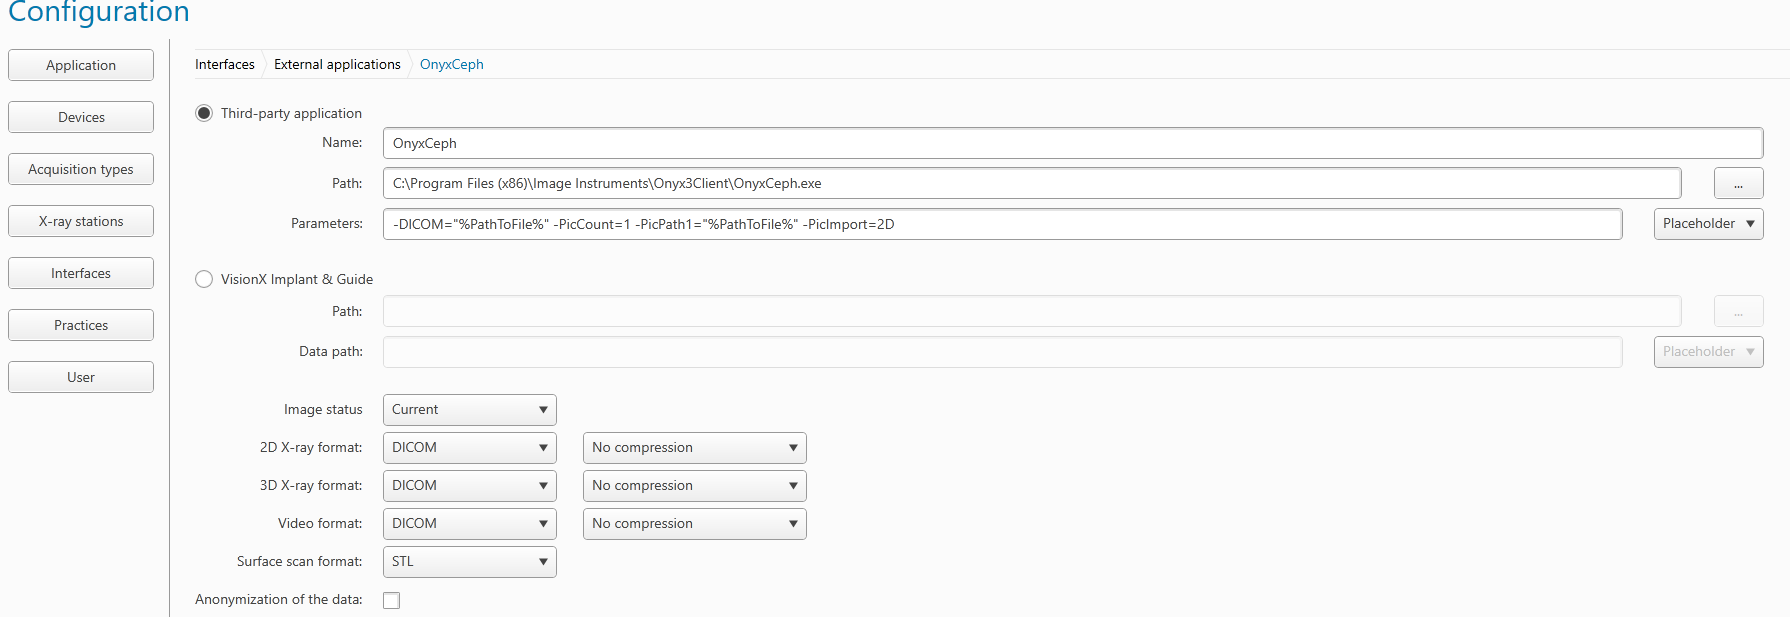
- This interface is only available from VistaSoft version 2.4.10!!!
- Open VistaSoft Configuration
- under Interfaces: "Third-party application" or under Features
- Create third-party application
- Enter "OnyxCeph" for Name
- At Path, enter the path to OnyxCeph.exe
- Under Parameters, enter the following parameters as shown in the screenshot. The VistaSoft placeholders can also be selected via the button on the right:
Parameter examples
Transfer of a JPG file:
-PatID="%PatientId%" -PicCount=1 -PicPath1="%PathToFile%" -Firstname="%PatientGivenName%"
-Lastname="%PatientFamilyName%" -Birthday=%BirthdateYYYYMMDD%
Transfer of a DICOM file:
-PatID="%PatientId%" -PicCount=1 -PicPath1="%PathToFile%"
Transfer of a DICOM file with master data comparison:
-DICOM="%PathToFile%" -PicCount=1 -PicPath1="%PathToFile%"
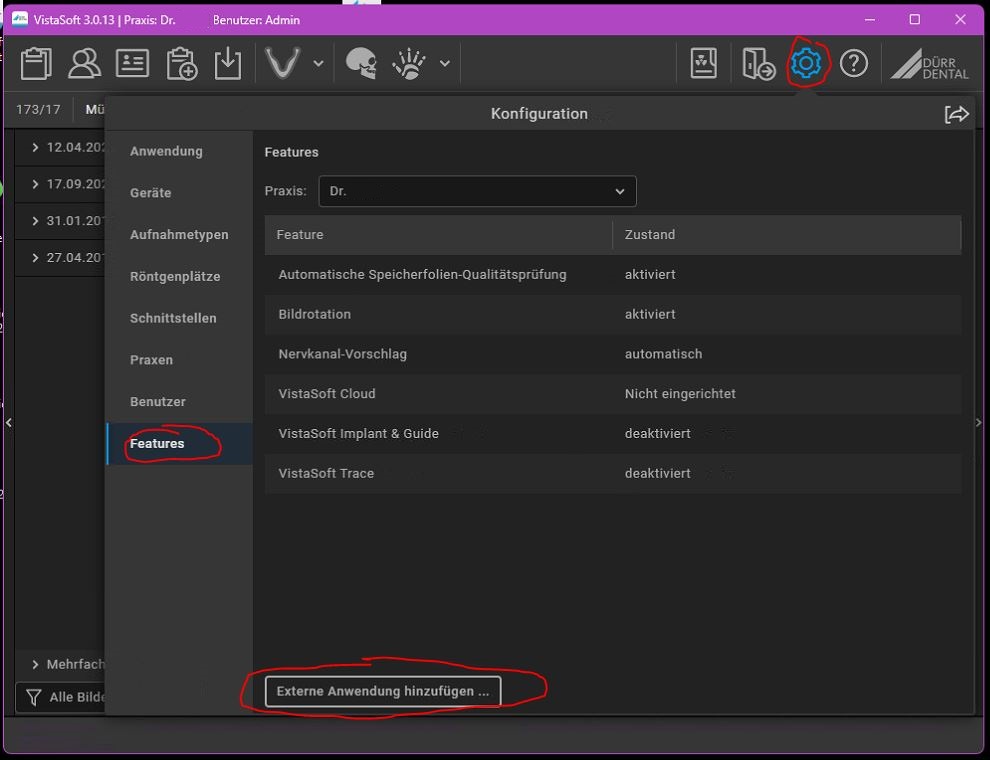
As of version 3.xx, the Add external application… button can be found in the configuration beneath Features:
en/vistascan.txt · Last modified: 2023/01/11 07:29 by holger