Table of Contents
Module Digitize 3D

| Program version | BASIC | 2D PRO | 3D PRO | LAB | OMS |
|---|---|---|---|---|---|
Availablility  |  | |  | | |
not included
included by default
 optionally included
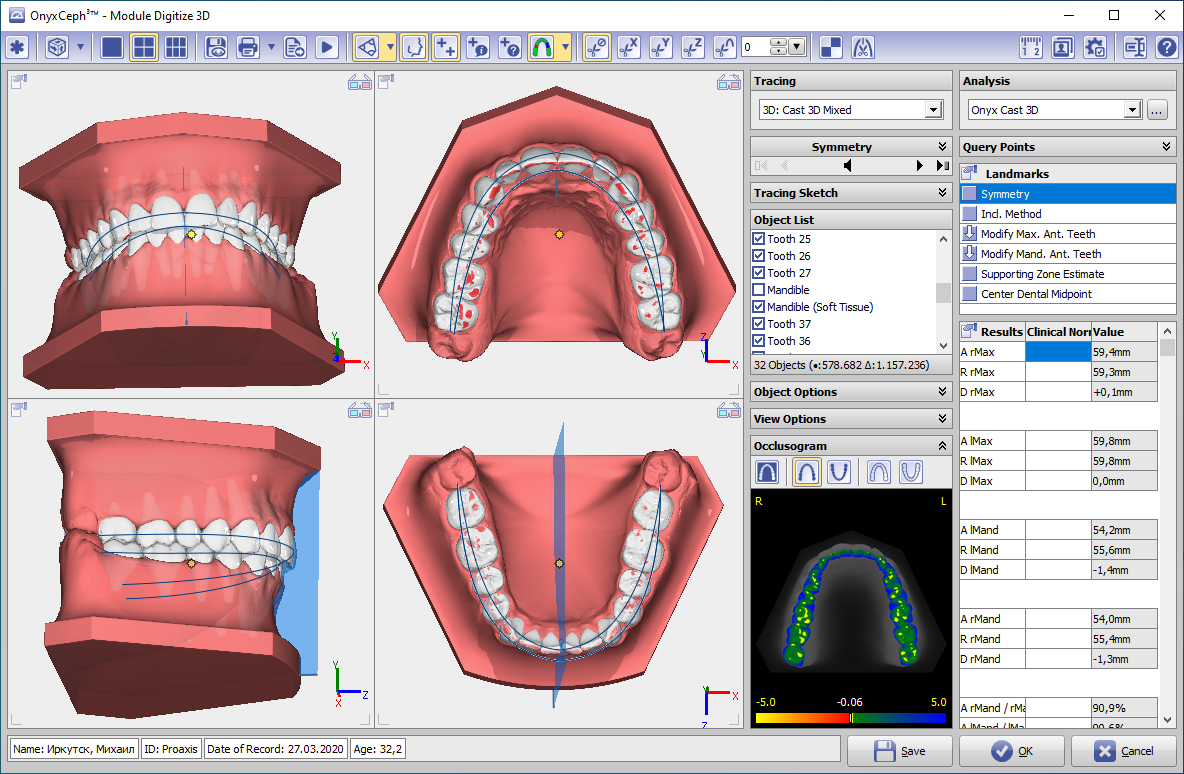
Module Digitize 3D offers the possibility of cephalometric measurements on the selected 3D image stored in the database. Depending on image type and tracing type of the 3D data record, various pre-installed evaluation methods (analyses) can be selected and applied individually or in groups.
Each analysis contains a fixed set of diagnostically meaningful variables, which can be derived from the position of certain reference points in the image and, if necessary, calculate with additional information.
Accordingly, the main function of the module is the localization of the required reference points on the data set and the automatic calculation of the analysis results based thereon as well as their graphical representation in the form of a tracing and other suitable display options. Other functions include the further processing or output of analysis results or of derived processing results.
First Steps
- Select tracing type and analysis
- Enter selection for query points in the list
- Place required landmarks on the 3D model
- Print results
- Save by [OK]
Module user interface