Inhaltsverzeichnis
Initial Server Configuration
1. Create Onyx_PDF Folder
Create folder C:\Onyx_PDF on server
2. Import Patches
(1) Download patch archive MOH_Onyx_Patch.zip which includes
- Riyahd cephalometric analysis patch
- PDF print form template patch
(2) Install patches via menu item Options|Install Patch.
3. Set PDF Export Folder
(1) Open main menu (F10)
(2) Select menu entry [Options|Systemoptions] on tab |Interfaces|
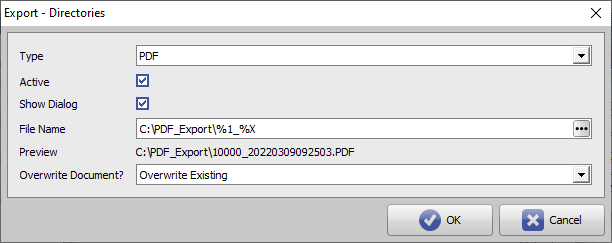
(3) Click button [Directories]
(4) Select ↓
- Type: PDF
- Checkbox [Active]: ✔
- Checkbox [Show Dialog]: ✔
- File name: C:\PDF_Export\%1_%X
- Overwrite Document: Overwrite Existing
4. Select Analysis
(1) Open Module Digitize on main tab |Images / 2D Data|
(2) Open the Select Analysis window by button […]
(3) Unselect all options and analyses by button [None]
(4) Then select only the Riyahd in analysis list.
5. Adjust Image Type Settings
(1) Open main menu (F10)
(2) Select menu entry [Options|Systemoptions] on tab |2D Image Types|
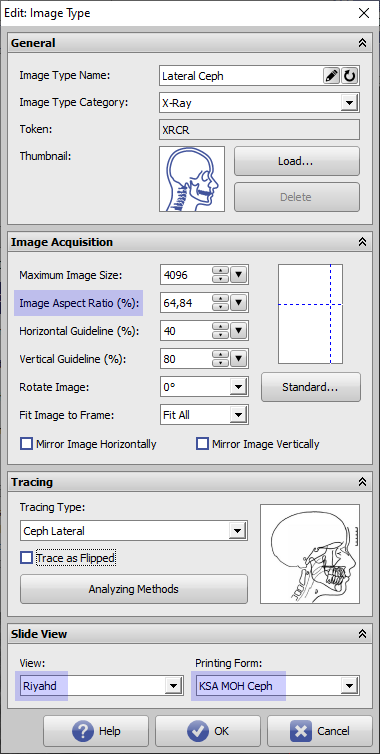
(3) Select Image Type [Lateral Ceph] and edit settings ↓
- Image Aspect Ratio (%): 64,84 [may be differenf for depending on PACS xray A/R]
- Select box [View]: Riyahd
- Select box [Printing Form]: KSA MOH Ceph
6. Create Global Template
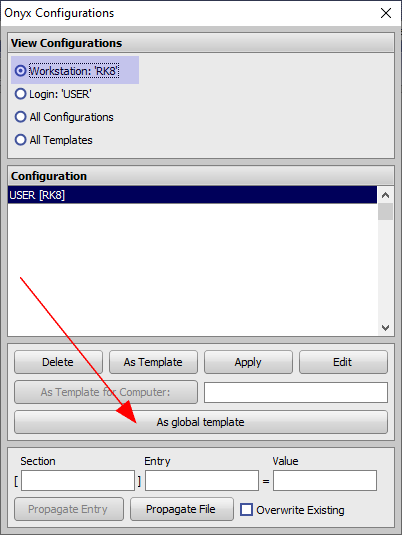
(1) Open context menu on main menu button by [SHIFT]+[CTRL} + Right click
(2) Click menu entry Configurations
(3) Select and define local configuration [As global template] for subsequent installed clients


