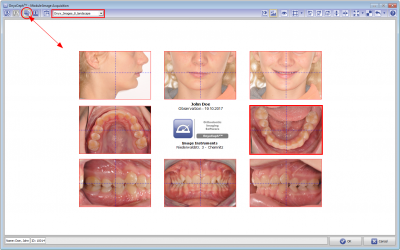
Serial Image Import 2D
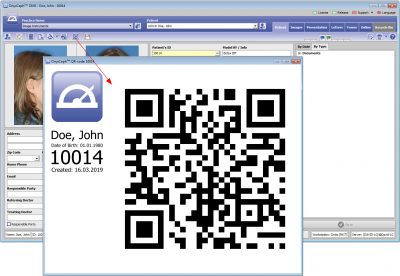
(1) Take a picture of the patient QR code on tab |Patient| as the 1st image of any predefined image type series
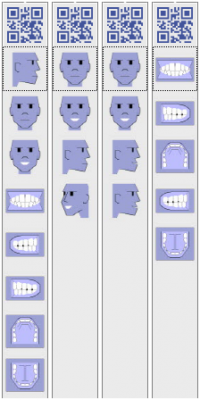
(2) Acquire the relevant image type series in the correct sequence. Avoid taking same image type twice.
Examples only
(3) Repeat (1)+(2) for any number of patients even before importing the images
(4) Make sure you have predefined the serial import parameters correctly
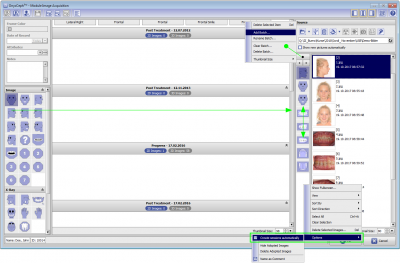
(A) Create any needed batch by drag&drop of image type icons to the batch panel in the correct acquisition sequence - you can also re-order vertically by drag&drop
(B) In the preview panel context menu, select [Options / Create sessions automatically] to have created appropriate sessions on image import automatically by image file date
(5-1) Serial Import w/o QR code image
(A) Make sure the correct patient record is selected
(B) Select the correct import batch [◄][►]
(C) Click [] to import the image series in the batch sequence.
Image types and image modifications (predefined for each image type in [Systemoptions| Image Types]) are assigned automatically.
(5-2) Serial Import with QR code image
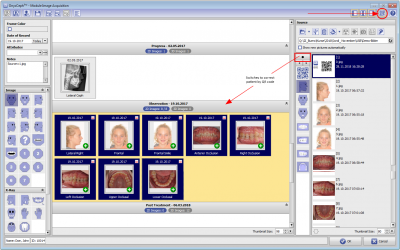
(A) Activate [QR] icon button for automatic patient record selection
(B) Select the correct import batch [◄][►]
(C) Click [] to import the image series in the batch sequence.
Image types and image modifications (predefined for each image type in [Systemoptions| Image Types]) are assigned automatically.
(6) Fine-adjust images regarding zoom, rotation, alignment, colors and orientation if needed. Save Gallery as Presentation for patient education

